Go to text Go to main menu

Products

Product Details

> 제품소개 > Floor / Waterproof > Epoxy Resin Mortar (DK-130)
Epoxy Resin Mortar  (DK-130)

Epoxy Resin Mortar (DK-130)

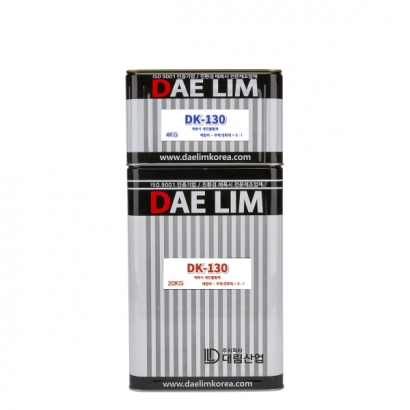
Epoxy Resin Mortar (DK-130) is made using epoxy resin and special colorants with excellent weather resistance, combined with high-quality fine sand to enhance slip resistance. It is designed to provide superior durability and performance in a variety of environments.

High Strength Performance: It provides 5 to 7 times better performance in compression, flexural, and tensile strength compared to concrete.

Excellent Adhesion: The use of epoxy resin ensures extremely strong adhesion.

No Shrinkage During Curing: There is no shrinkage during the curing process, preventing crack formation.

Abrasion and Chemical Resistance: It offers outstanding abrasion and chemical resistance, maintaining excellent performance in various environments.

Rapid Initial Strength Development: It achieves an initial compressive strength of 200-300 kgf/cm² within 24 hours of application.


Category

Epoxy Resin Mortar (DK-130)

Resin

Hardener

Type

Epoxy

Polyamine

Appearance/Color

Transparent

Light yellow

Mixing Ratio

Resin/Hardener = 5: 1

Pot Life

40 minutes ± 10 minutes (25℃)

Full Curing time

24~36 hours (25℃)

Theoretical Consumption

1.26 ± 0.03

Packaging Unit

20kg

4kg


1. Surface Preparation

  • First, inspect the concrete surface to check for laitance (fine dust layer on the surface), other contaminants, and damaged epoxy layers. Any defects on the surface should be removed.
  • Use a grinder to remove laitance, oil, contaminants, and damaged epoxy layers. This process smoothens the surface and flattens uneven or rough areas.
  • After grinding, use a sand grinder to further refine the surface and correct any minor defects or uneven areas. Sanding helps achieve a more precise finish.
  • After grinding and sanding the surface, use a vacuum cleaner to thoroughly remove dust and contaminants. This step is essential to clean the surface for subsequent work.
  • Once the surface is completely dry, it is ready for the next steps. Ensure there is no moisture or water left, as it may affect the adhesion of coatings.


2. Priming

  • Preparation: Stir the paint thoroughly before use to achieve a uniform consistency.
  • Precaution: Ensure the correct ratio of the base and hardener is followed to prevent issues such as poor drying or adhesion failure.
  • Mixing: After mixing the base and hardener, stir thoroughly with a mixer to ensure even blending before use.
  • Application: Use a roller or brush to apply a single coat with a thickness of 50µm on the surface, ensuring that the paint is fully absorbed and the coating is applied evenly. Additionally, areas with high absorption during the first coat should receive an extra layer of primer.


3. Mixing and Troweling

  • Accurately mix the base hardener in the specified weight ratio, then combine it with silica and epoxy resin to create the mortar.
  • Apply the mixed mortar to the surface using a trowel, spreading it thinly while ensuring no ridges form on the top layer.
  • For a 5mm thickness per 1m², the required materials are approximately 2.5kg of resin and 10kg of silica.
  • If the resin sticks to the trowel and makes the work difficult, clean the trowel with thinner while continuing the work.


4. Surface Treatment

  • Before applying the mixed mortar, thinly coat the surface with epoxy resin using a roller or rubber trowel.
  • This improves adhesion to the surface and enhances workability. It also prevents curling during application due to the strong adhesive properties.


5. Intermediate Work

  • After the mortar layer has fully cured, grind off any protruding silica or contaminants from the surface using sandpaper or a grinder.
  • To fill in any surface irregularities and pores, mix the filler according to the weight ratio and apply it using a rubber trowel or roller. This process smoothens and evens out the surface, allowing the topcoat application to be more effective.


6. Topcoat Application

After the intermediate work, proceed with the topcoat application once the filler has fully cured. The final coating protects the surface and provides an aesthetically pleasing finish.


  • For more details, please refer to the Technical Data Sheet (TDS) or the specifications.
TOP