Go to text Go to main menu

Products

Product Details

> 제품소개 > Floor / Waterproof > Epoxy Floor Intermediate Coat (DK-110)
Epoxy Floor Intermediate Coat (DK-110)

Epoxy Floor Intermediate Coat (DK-110)

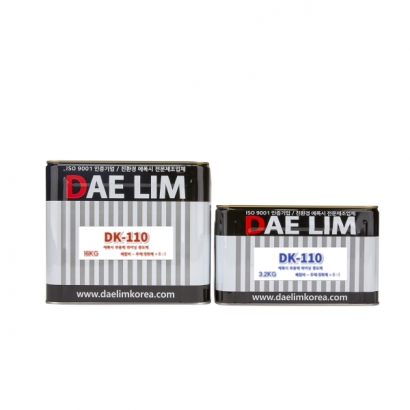
Epoxy Floor Intermediate Coat (DK-110) is a high-performance, two-component epoxy resin designed for the intermediate stages of floor coating systems. It maximizes adhesion with topcoats and enhances floor durability for a long-lasting finish.

Enhanced Chemical Resistance: Outstanding resistance to various chemicals, ideal for industrial environments.

Abrasion Resistance: Withstands impact and friction, extending the floor’s lifespan.

High-Gloss Finish: Provides a polished look, brightening spaces and making them more inviting. The surface is also easy to clean.

Exceptional Physical Properties: Offers superior abrasion, impact, and chemical resistance for stable performance in diverse environments.

Factories and Warehouses: Ideal for factory and warehouse floors, where high traffic and heavy wear are common, ensuring long-lasting durability.


Category

Epoxy Floor Intermediate Coat (DK-110)

Resin

Hardener

Type

Epoxy

Polyamine

Appearance/Color

Green, Gray, Other

Light yellow

Mixing Ratio

Resin/Hardener= 5: 1

Pot Life

40 minutes ± 10 minutes (25℃)

Full Curing time

24-36hours (25℃)

Packaging Unit

16kg

3.2kg


1. Surface Preparation

  • First, inspect the concrete surface to check for laitance (fine dust layer on the surface), other contaminants, and damaged epoxy layers. Any defects on the surface should be removed.
  • Use a grinder to remove laitance, oil, contaminants, and damaged epoxy layers. This process smoothens the surface and flattens uneven or rough areas.
  • After grinding, use a sand grinder to further refine the surface and correct any minor defects or uneven areas. Sanding helps achieve a more precise finish.
  • After grinding and sanding the surface, use a vacuum cleaner to thoroughly remove dust and contaminants. This step is essential to clean the surface for subsequent work.
  • Once the surface is completely dry, it is ready for the next steps. Ensure there is no moisture or water left, as it may affect the adhesion of coatings.


2. Priming

  • Preparation: Stir the paint thoroughly before use to achieve a uniform consistency.
  • Precaution: Ensure the correct ratio of the base and hardener is followed to prevent issues such as poor drying or adhesion failure.
  • Mixing: After mixing the base and hardener, stir thoroughly with a mixer to ensure even blending before use.
  • Application: Use a roller or brush to apply a single coat with a thickness of 50µm on the surface, ensuring that the paint is fully absorbed and the coating is applied evenly. Additionally, areas with high absorption during the first coat should receive an extra layer of primer.


3. Crack Filling

  • After priming, apply filler to any cracks on the surface. Use the filler to fill in any cracks or surface defects, spreading it evenly and allowing it to dry. Crack filling smooths the surface and helps subsequent coatings adhere properly. Once the filler has fully cured, sanding may be necessary to level the surface.


4. Intermediate Coating (Epoxy Lining)

  • After applying the primer, wait at least 24 hours before calculating the required amount based on the painting area and a film thickness of 0.5mm. Mix the base and hardener of the epoxy lining product in the correct ratio. The mixed epoxy product should be evenly applied using a rake or spatula to achieve a total film thickness of 3mm. Any air bubbles formed during the application can be removed by adding epoxy thinner.
  • The second lining process is applied when, after the first coat, areas with excessive absorption or uneven film thickness are observed. After the first coat, the paint may not be fully absorbed, or the film thickness may not be evenly distributed. Therefore, an additional coat is necessary to address these issues. The second lining ensures uniform film thickness and improves the overall coating quality.

5. Topcoat Application

  • Once the second lining is complete, the next step is to apply the topcoat. The topcoat plays a crucial role in enhancing weather resistance and preventing discoloration, while also strengthening the protective layer of the epoxy coating, making cleaning and maintenance easier.
  • Before applying additional coats or topcoats, allow sufficient curing time and strictly follow the product instructions. If necessary, consider additional curing time.


  • For more details, please refer to the Technical Data Sheet (TDS) or the specifications.
TOP