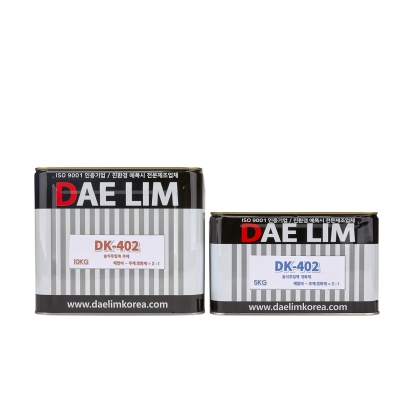
Fine Crack Penetration: With a low viscosity, it perfectly injects into micro-cracks.
Strong Adhesion: Provides excellent bonding to wet concrete and cement.
Durability: Resistant to chemical effects and excels in corrosion prevention.
Low-Viscosity: With a penetration capability of 0.3 mm, this wet low-viscosity injection resin effectively fills fine cracks, ensuring optimal adhesion and waterproofing.
Category | Low-viscosity Wet Epoxy Crack Filler (DK-402) | |
Base Material | Hardening Agent | |
Major Composition | Epoxy resin | Poly-amine |
Appearance | Colorless transparent liquid | Light Yellow |
Viscosity | 300 CPS | 50CPS |
Pot Life | 1 hour (25°C) | |
Curing Time | 24 ~ 36 hours (25°C) when pressing steel plate | |
Theoretical Amount requirement (m2) | 0.25 ± 0.1kg | |
Mixing ratio | Base Material : Hardening Agent = 2 : 1 | |
Packaging Unit | 10Kg | 5Kg |
1.Crack Inspection and Method Selection: Inspect the crack area, its condition, width, and depth before construction to determine the appropriate repair method and the viscosity of the injection material.
■ Low-Pressure Injection Method:
Principle: Uses force similar to rubber bands or springs to inject material at low pressure.
Application: Primarily used for repairing narrow areas or fine cracks, and is also suitable for cases where the cracks are exposed externally, making installation easier.
■ High-Pressure Injection Method:
Principle: Uses an injection machine to inject material into the crack at high pressure.
2.Surface Cleaning: Cleaning the repair area is essential to prevent reduced injection volume and surface adhesion due to contaminants. Remove dirt and dust using brushes and grinders, and clean any grease with solvents such as thinner.
3.Anchor Placement: After determining the anchor installation area, use epoxy sealant with a thickness of approximately 1mm and a width of 30mm to seal the crack surface and prevent gaps. The placement of the anchor may vary depending on the shape of the crack.
4.Attachment: Once the epoxy sealant (dry or wet) application is complete, attach and secure the anchor.
5.Curing Check: Verify that the epoxy has fully cured before proceeding to the next step. (Allow approximately 24 hours or more for curing.)
6.Mixing: Carefully mix the resin and hardener in the exact specified ratio, ensuring a uniform consistency throughout the process.
7.Injection: Use injection equipment to apply the prepared mixture into the gaps, ensuring a consistent amount is injected and finishing the surface.
8.Additional Work: After confirming that the injected material has completely filled the gaps, perform additional injections if needed to ensure a perfect seal.
9. Finalizing: After the work is completed, use a hand grinder to clean the surface and apply additional finishing materials if necessary.
For more details, please refer to the Technical Data Sheet (TDS) or the specifications.