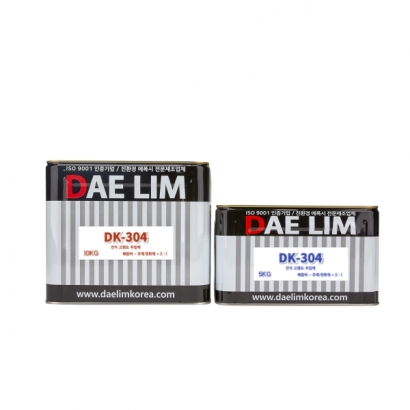
Self-Curing Epoxy: Provides excellent adhesion and durability, ensuring reliable performance in various environments.
Superior Mechanical Strength: After curing, it achieves outstanding mechanical strength and chemical resistance, making it suitable for structures subjected to heavy loads and ensuring structural stability.
High Viscosity: Ideal for filling cracks larger than 0.6 mm and larger voids, it offers effective structural reinforcement and strong bonding capabilities.
Category | Dry high-viscosity Epoxy Crack Filler (DK-304) | |
Base Material | Hardening Agent | |
Major Composition | Epoxy resin | Poly-amine |
Appearance | Creamy White | Lemon yellow |
Pot Life | 40 minutes ±10 minutes (25°C) | |
Curing Time | 24 ~ 36 hours (25°C) when pressing steel plate | |
Theoretical Amount requirement (m2) | 0.25 ± 0.1kg | |
Mixing ratio | Base Material : Hardening Agent = 2 : 1 | |
Packaging Unit | 10Kg | 5Kg |
1. Crack Inspection and Surface Preparation
Before starting the injection, thoroughly inspect the crack to determine its condition, length, and depth to establish the scope of the work. If there is any dust or contaminants at the site, they should be thoroughly removed to maximize the adhesion of the injection material. It is important to use fine brushes or cleaning tools to ensure that even the inner surfaces are completely clean.
2. Crack Sealing
To prevent the injection material from leaking and to enhance the effectiveness of the injection, crack sealing is required. Sealing should be done by applying a sealant with a width approximately 1.5 times the crack's width to the crack surface. After sealing, allow sufficient drying time before injecting the material.
3. Drilling
Drilling is a critical step that allows the injection material to penetrate effectively. Drill holes along the crack at regular intervals, typically between 10cm and 50cm apart. The depth of the drilling should be determined based on the crack’s depth and structure, with a recommended minimum depth of 10cm. Each drilling point should be positioned and angled carefully to ensure accurate injection.
4. PACKER Installation
After drilling, install a PACKER into each drilled hole. The PACKER is used to inject the material into the crack, and it should be chosen based on the diameter and depth of the hole. After installation, ensure that the PACKER is tightly sealed to prevent any leakage during the injection process.
5. Injection Material Mixing and Preparation
Mix the injection material according to the site conditions. When using high-viscosity materials, adjust the mixing ratio to consider the injection speed and curing time. Ensure the material is mixed thoroughly to achieve a uniform consistency and maintain the proper temperature for the application.
6. Injection of Material
Inject the prepared material into the crack through the PACKERs. Control the injection pressure to ensure the material penetrates evenly throughout the entire crack. Be careful to prevent any leakage around the PACKER during injection. If necessary, adjust the pressure during the process to maximize the efficiency of the injection.
7. Material Curing and PACKER Removal
After injecting the material, allow adequate time for it to fully cure. Once curing is complete, remove the PACKERs and neatly seal the drilled holes with finishing material to ensure they are not visible from the exterior.
8. Finishing Work
After the injection and PACKER removal, clean and smooth the surface of the injected area and carry out any necessary finishing work. This step is crucial for reinforcing the durability of the injection area and enhancing the aesthetic quality.
For more details, please refer to the Technical Data Sheet (TDS) or the specifications.