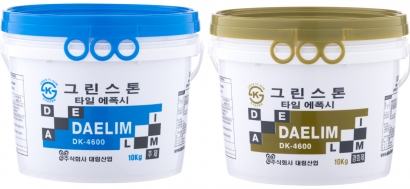
Strong Bonding Capability: Effectively bonds indoor tiles and marble, ensuring a secure hold for your tiling projects.
Reliable Waterproofing and Repair: Perfect for repairing leaks in swimming pool tiles, channels, and reservoirs, providing excellent waterproof performance for all tile applications.
Moisture Resistance & Crack Repair: Ideal for bathroom and kitchen tiles, DK-4600 effectively seals cracks and gaps in tile work, ensuring lasting durability.
Category | Base Material | Hardening Agent |
Major Composition | Epoxy Resin | Polyamide |
Appearance | White | Light Gray |
Packing Unit | 10kg PL | 10kg PL |
Application | Earthenware, Porcelain, Stoneware, Stone | |
Standard Usage | abt. 3~4kg/m2, abt. 5~7m2/20kg(1set) The usage may increase or decrease depending on the type and size of the substrate and tiles. | |
Specific Gravity | 1.6±0.1 | 1.7±0.1 |
Pot Life after mixing | 30 ~ 40min. (25°C) | |
Early Curing Time | 4hrs (25°C, Fully cured : 7days) | |
Mixing Ratio | Base Material : Hardening agent = 1 : 1 | |
Storage | 6 Months | |
1. Pre-Installation Checklist
(1) Make sure the surface is completely dry before applying
(2) Clean the substrate thoroughly to remove dust, oil, and residues.
(3) Check the smoothness (±1mm/2m) and surface condition of the substrate, especially for masonry surfaces like plaster, and perform necessary repairs in advance.
(4) Allow concrete or plaster surfaces to cure sufficiently (at least 4 weeks) before applying adhesive.
2. Eco-Friendly Epoxy Adhesive Application
(1) Prepare the product and installation tools (mixing board, measuring and mixing utensils).
(2) Mix resin and hardener in equal parts (1:1 ratio) on a mixing board until the color is consistent.
(3) Spread the mixed epoxy adhesive on the back of tiles using a trowel or similar tool (cover about 40% of the tile area).
(4) Attach the tiles within 40 minutes to ensure proper adhesion before the open time expires. (Open time can vary due to temperature, humidity, and wind.)
(5) Press and twist the tiles using tools like spacers to secure them, ensuring consistent spacing is maintained.
3.Curing and Protection
(1) Curing
Avoid impact, water splashing, and walking on the surface until full curing is achieved.
(2) Protection
Perform maintenance procedures to protect against external impact and contamination after installation.
For more details, please refer to the Technical Data Sheet (TDS) or the specifications.